
Device Interconnect: Connect Your Devices Directly, Anywhere, Anytime – No Public IP, No Port Forwarding Hassle
Want to access Claude Code, SSH, or internal services on your home/office computer from outside using your phone or another computer, but stuck with no public IP, afraid to open port forwarding, and finding frp/PeanutHull configuration annoying? Device interconnection can be enabled with one click in the desktop client, adding each of your devices to your private encrypted network, giving each device a fixed private IP, making them directly connected as if they are on the same LAN no matter where you are — end-to-end encryption, zero public exposure, and one-click revocation at any time.
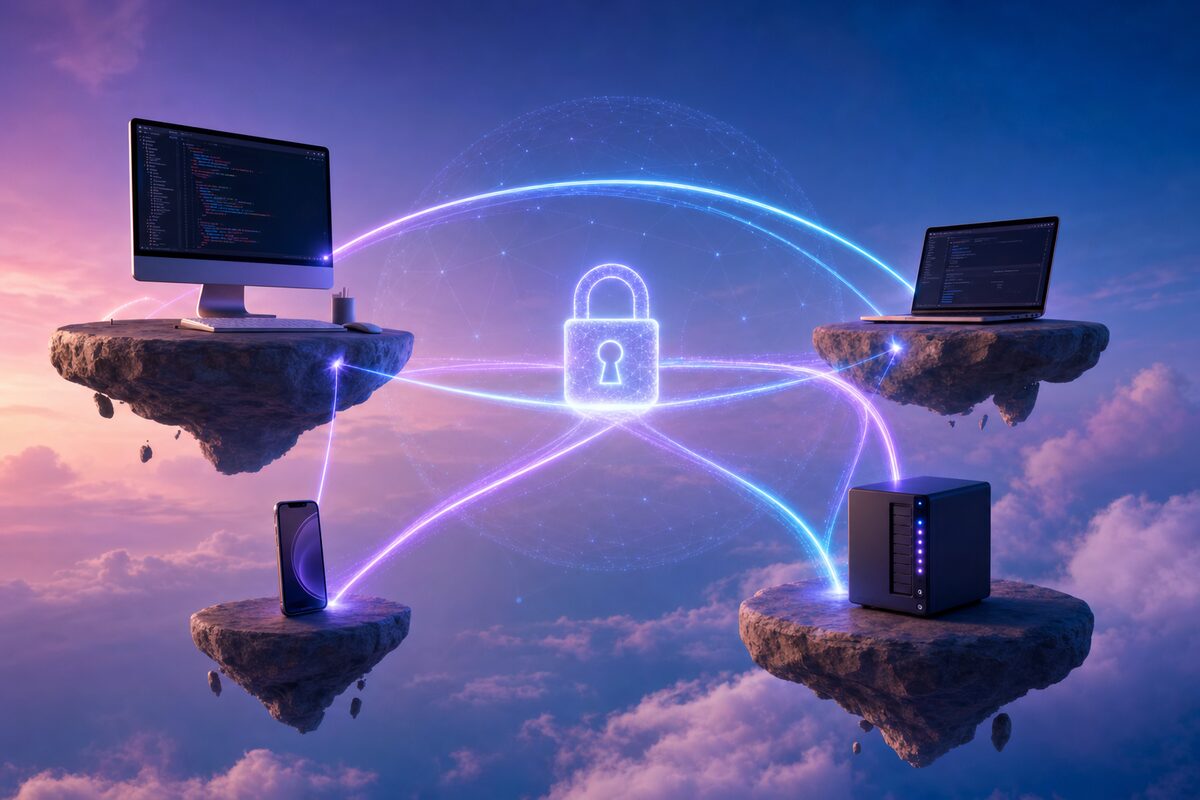
Have you ever encountered this scenario:
You have Claude Code running a task on your development machine at the office. Later, you step out and want to check on it from your phone or home computer – only to find you can't connect at all. That machine has no public IP, it's hidden behind a router. Opening port forwarding feels insecure and requires fiddling with your router. Using frp, Ngrok, or other NAT traversal tools involves complex configuration and renting a server.
Device Interconnect is designed to solve this: In the PandaNpc desktop client, just click "Enable Device Interconnect" and that device joins your own private, encrypted virtual network. After that, all your devices get a fixed private IP (e.g., 100.64.0.2), and they can connect directly to each other as if they were on the same LAN – no matter where they are or whether they have a public IP.
Why You Need Device Interconnect
- 🏠 Access home/office machines from outside: Your phone or laptop is on an external network, while your development machine at home is behind a local network. Device Interconnect makes them reachable to each other for Claude Code, SSH, or checking internal services.
- 🔌 Say goodbye to port forwarding and public exposure: No need to open ports on your router or expose services to the public internet – zero attack surface.
- 🧩 No server, no complex configuration: Unlike frp, you don't need to rent a server with a public IP or write a bunch of forwarding rules. Just click to enable, and you get a fixed private IP.
- 🔒 Encryption at every hop: Traffic between devices is end-to-end encrypted. No one in between can see the content.
How It Works
Under the hood, Device Interconnect uses a self-hosted WireGuard-based virtual network (similar technology to Tailscale):
- When a device joins, the control plane assigns it a stable private IP (from the
100.64.x.xrange). This IP stays with the device regardless of network environment changes. - Devices prioritize direct connections: NAT traversal creates a peer-to-peer encrypted tunnel between two machines, so data never passes through any third party.
- In rare cases where NAT traversal fails (e.g., symmetric NAT), the connection automatically falls back to a relay to ensure continuous connectivity.
- The entire connection uses WireGuard end-to-end encryption. The control plane only coordinates "who can connect to whom" and never sees your data.
In short: You get a private network that belongs only to you, is encrypted, and is reachable anytime, anywhere.
How to Enable: One Click in the Desktop Client
On a machine with the PandaNpc desktop client (Windows / macOS / Linux), enabling it takes just one step:
Open the client → Settings → Connected Devices → Click "Enable Connected Devices".
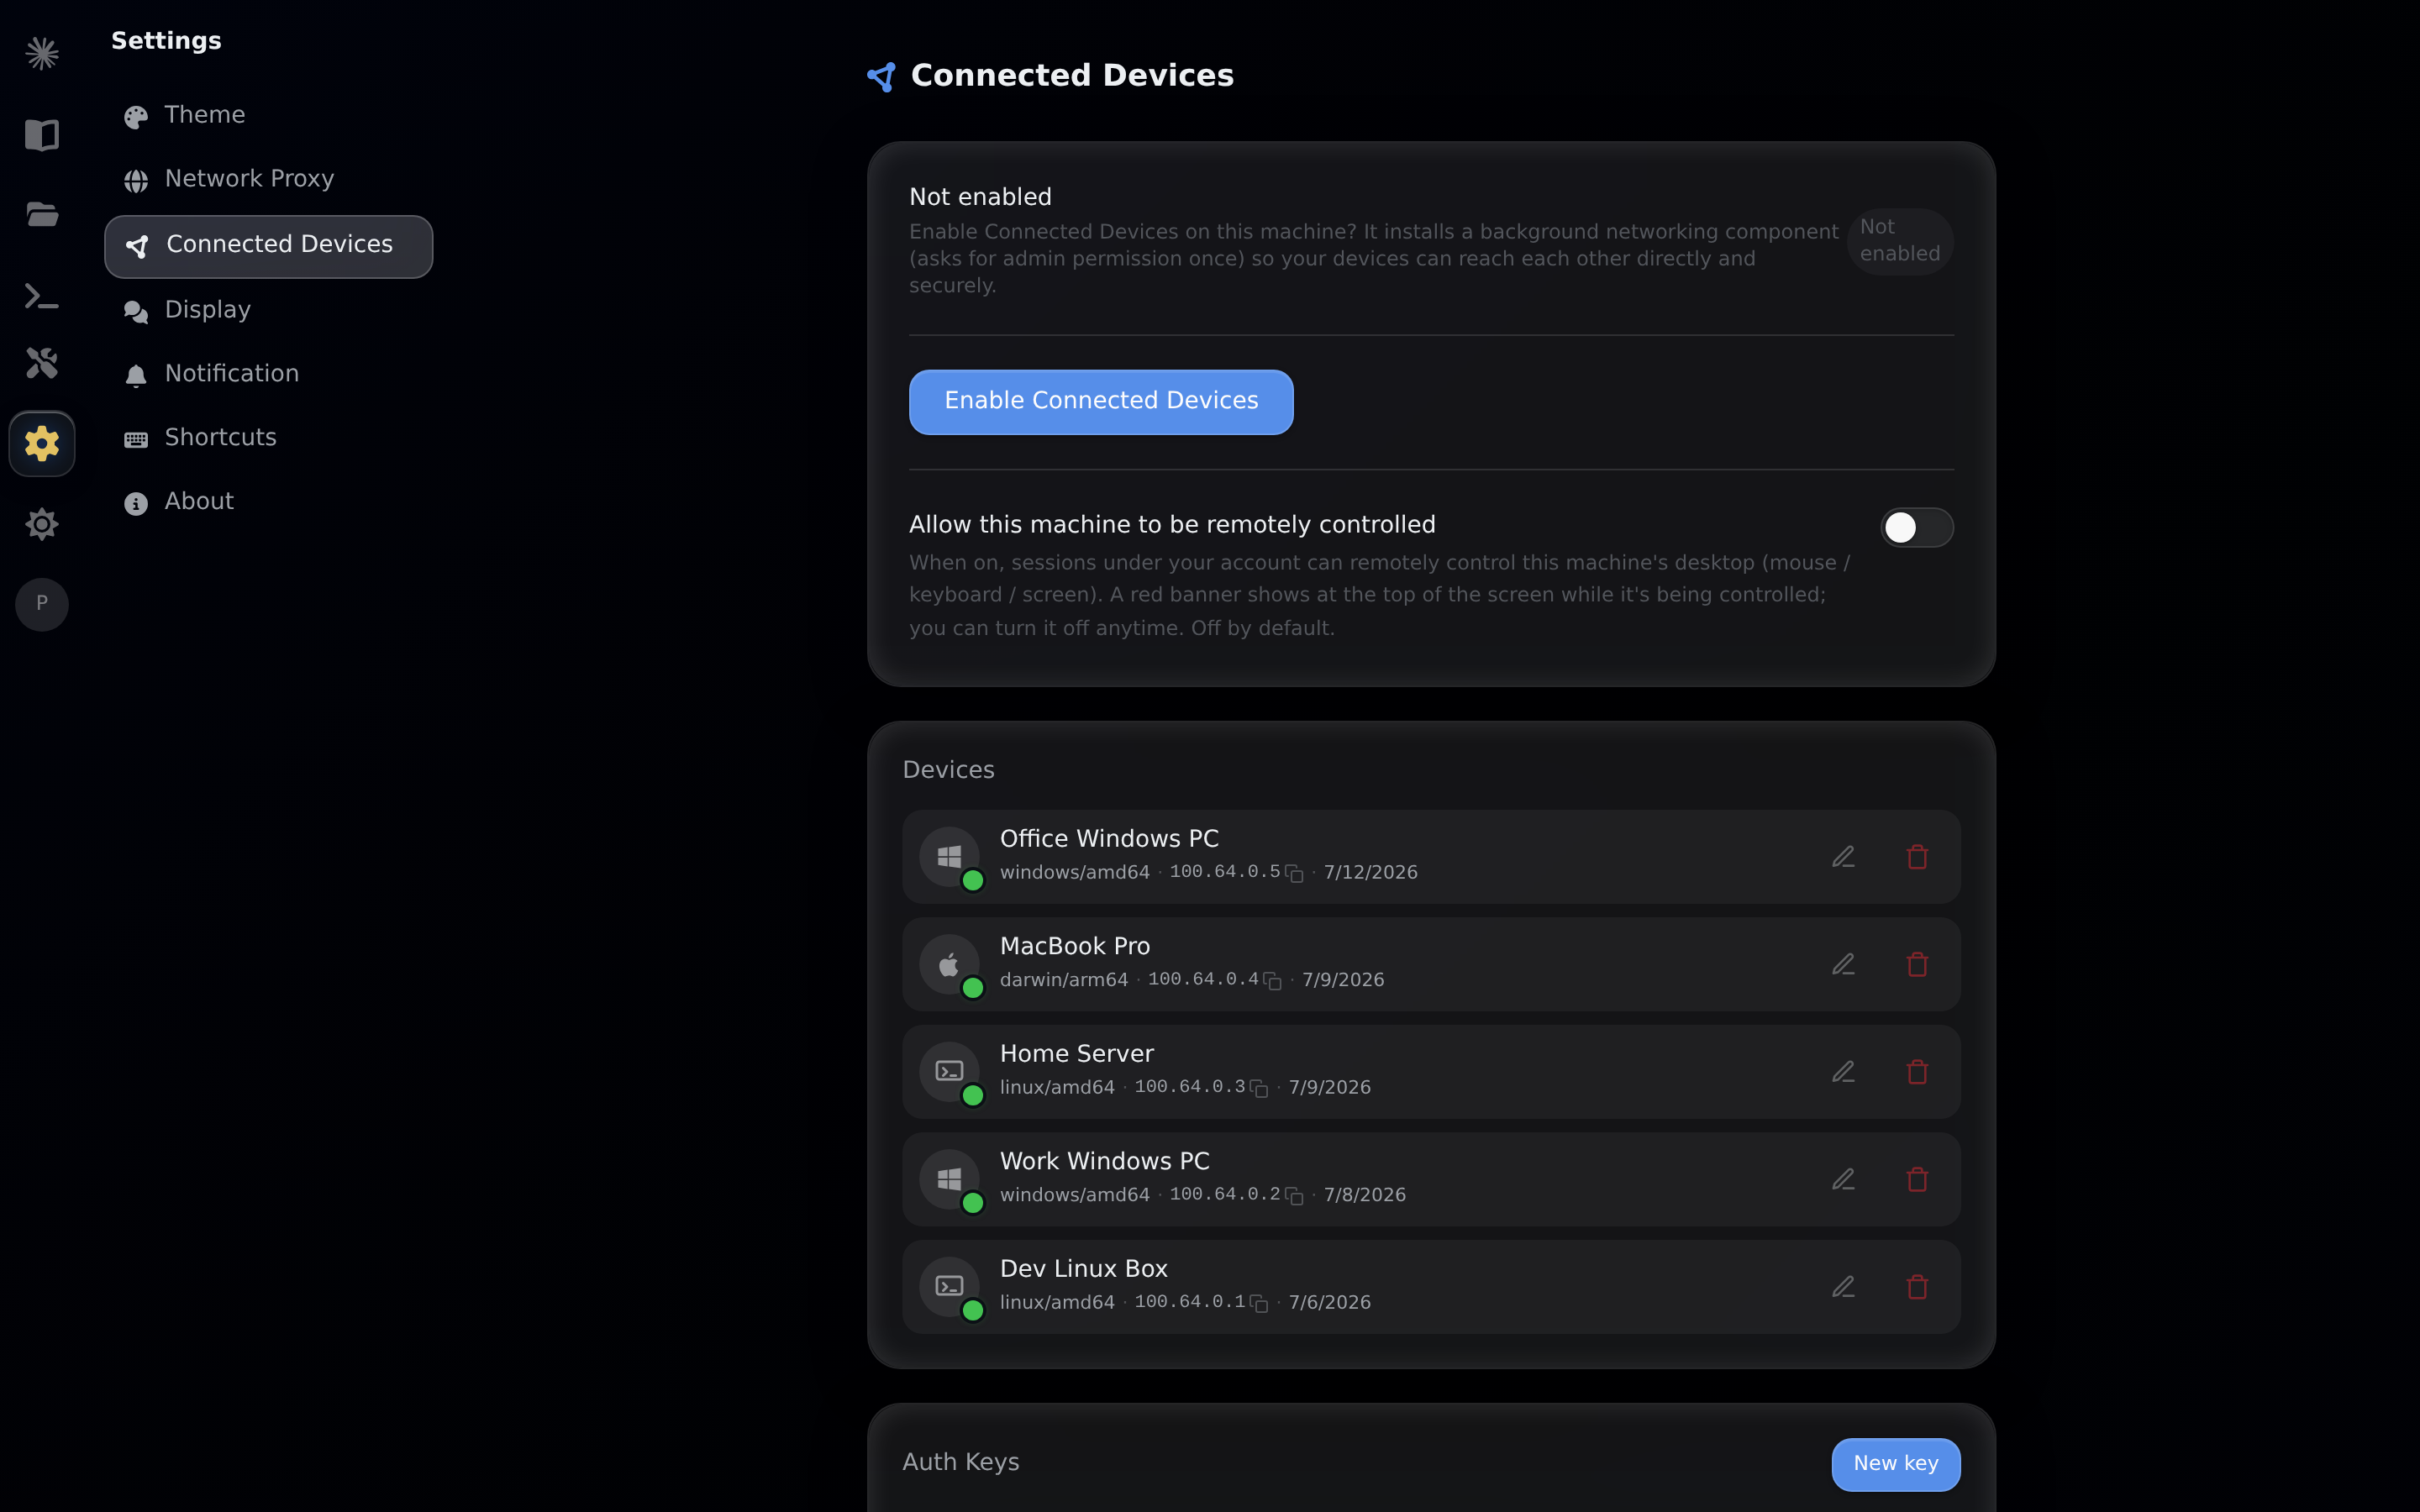
Once clicked, the client handles everything automatically: it downloads and installs the background networking component, registers the device with your account, and joins the network. The first time you enable it, you will be asked for system administrator authorization (required to install the background network service). After that, it's fully automatic and usually completes within seconds.
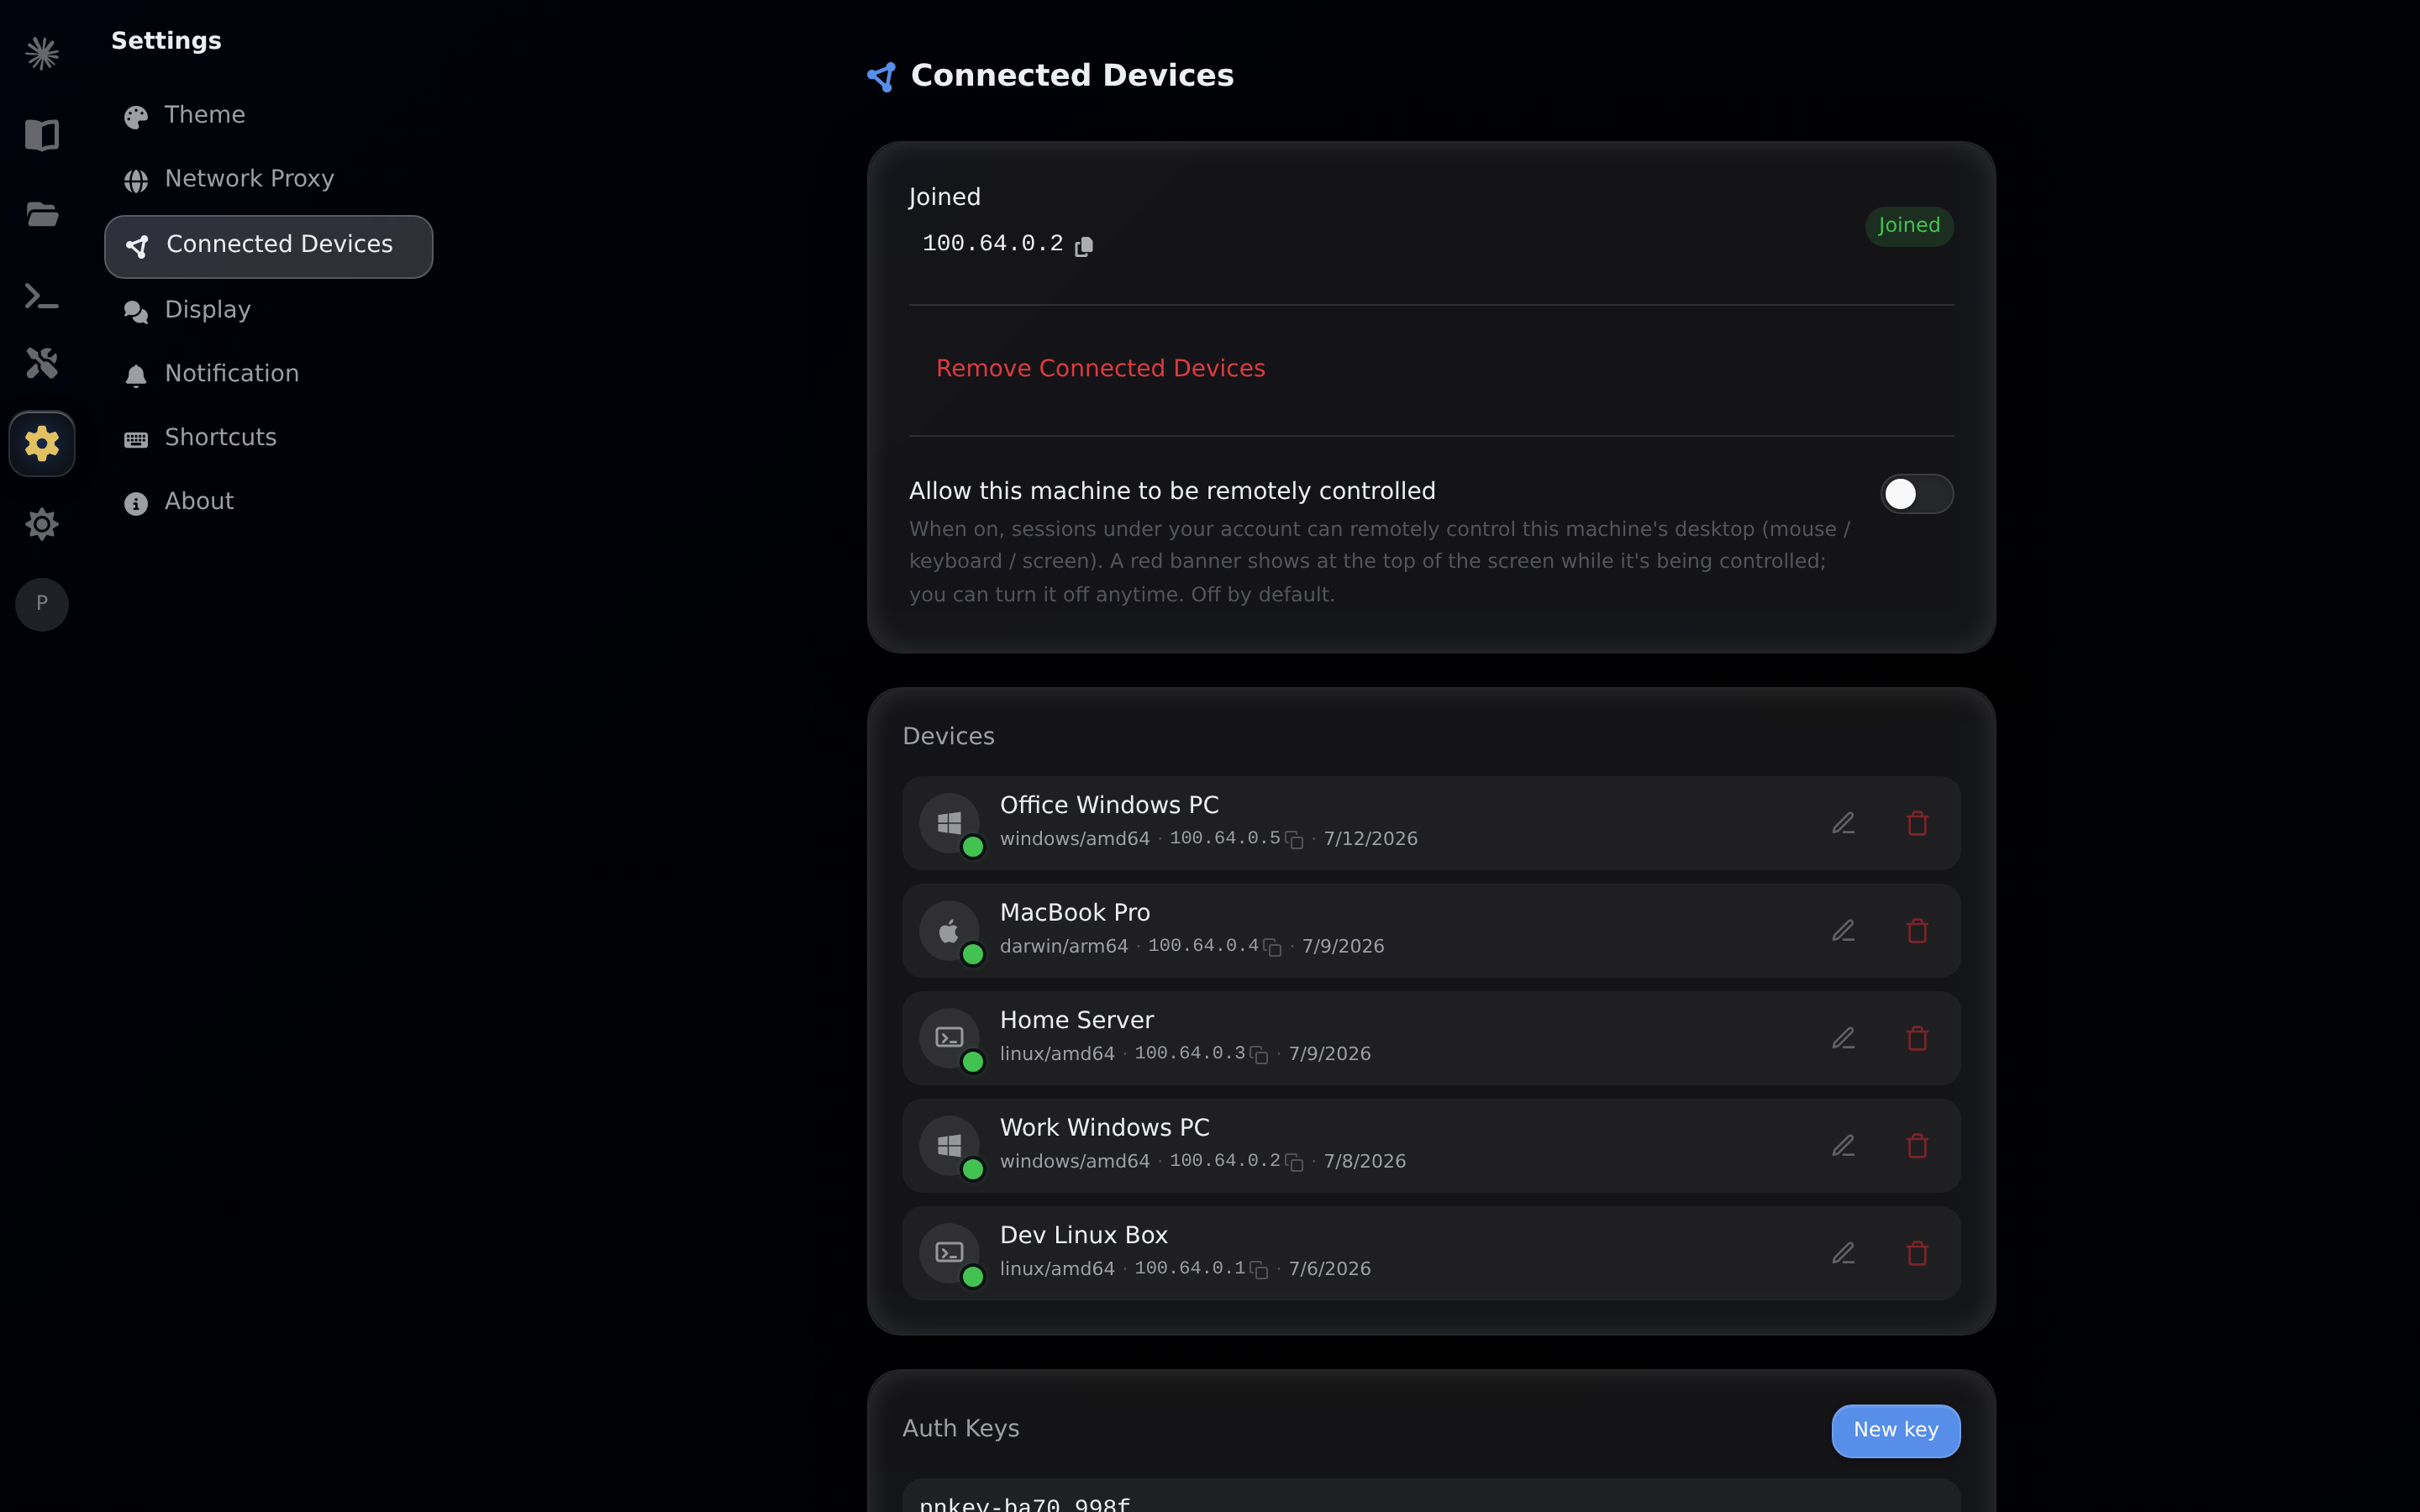
After successfully joining, the status card shows Joined and displays the device's dedicated private IP – click to copy it, then use it to connect from other devices:
Tips:
- Auto-pair after login: On first launch, the client silently installs the components in the background. After logging in, pairing and joining happen automatically. In most cases, you won't even need to manually click the switch.
- Remove anytime: Click "Remove Connected Devices" on the same page to stop the networking service on this device (the installation remains; you can re-enable instantly without re-downloading).
Managing All Your Devices
After joining, the device management panel appears below the settings page (or you can open pandanpc.com/devices in a browser – both show the same content):
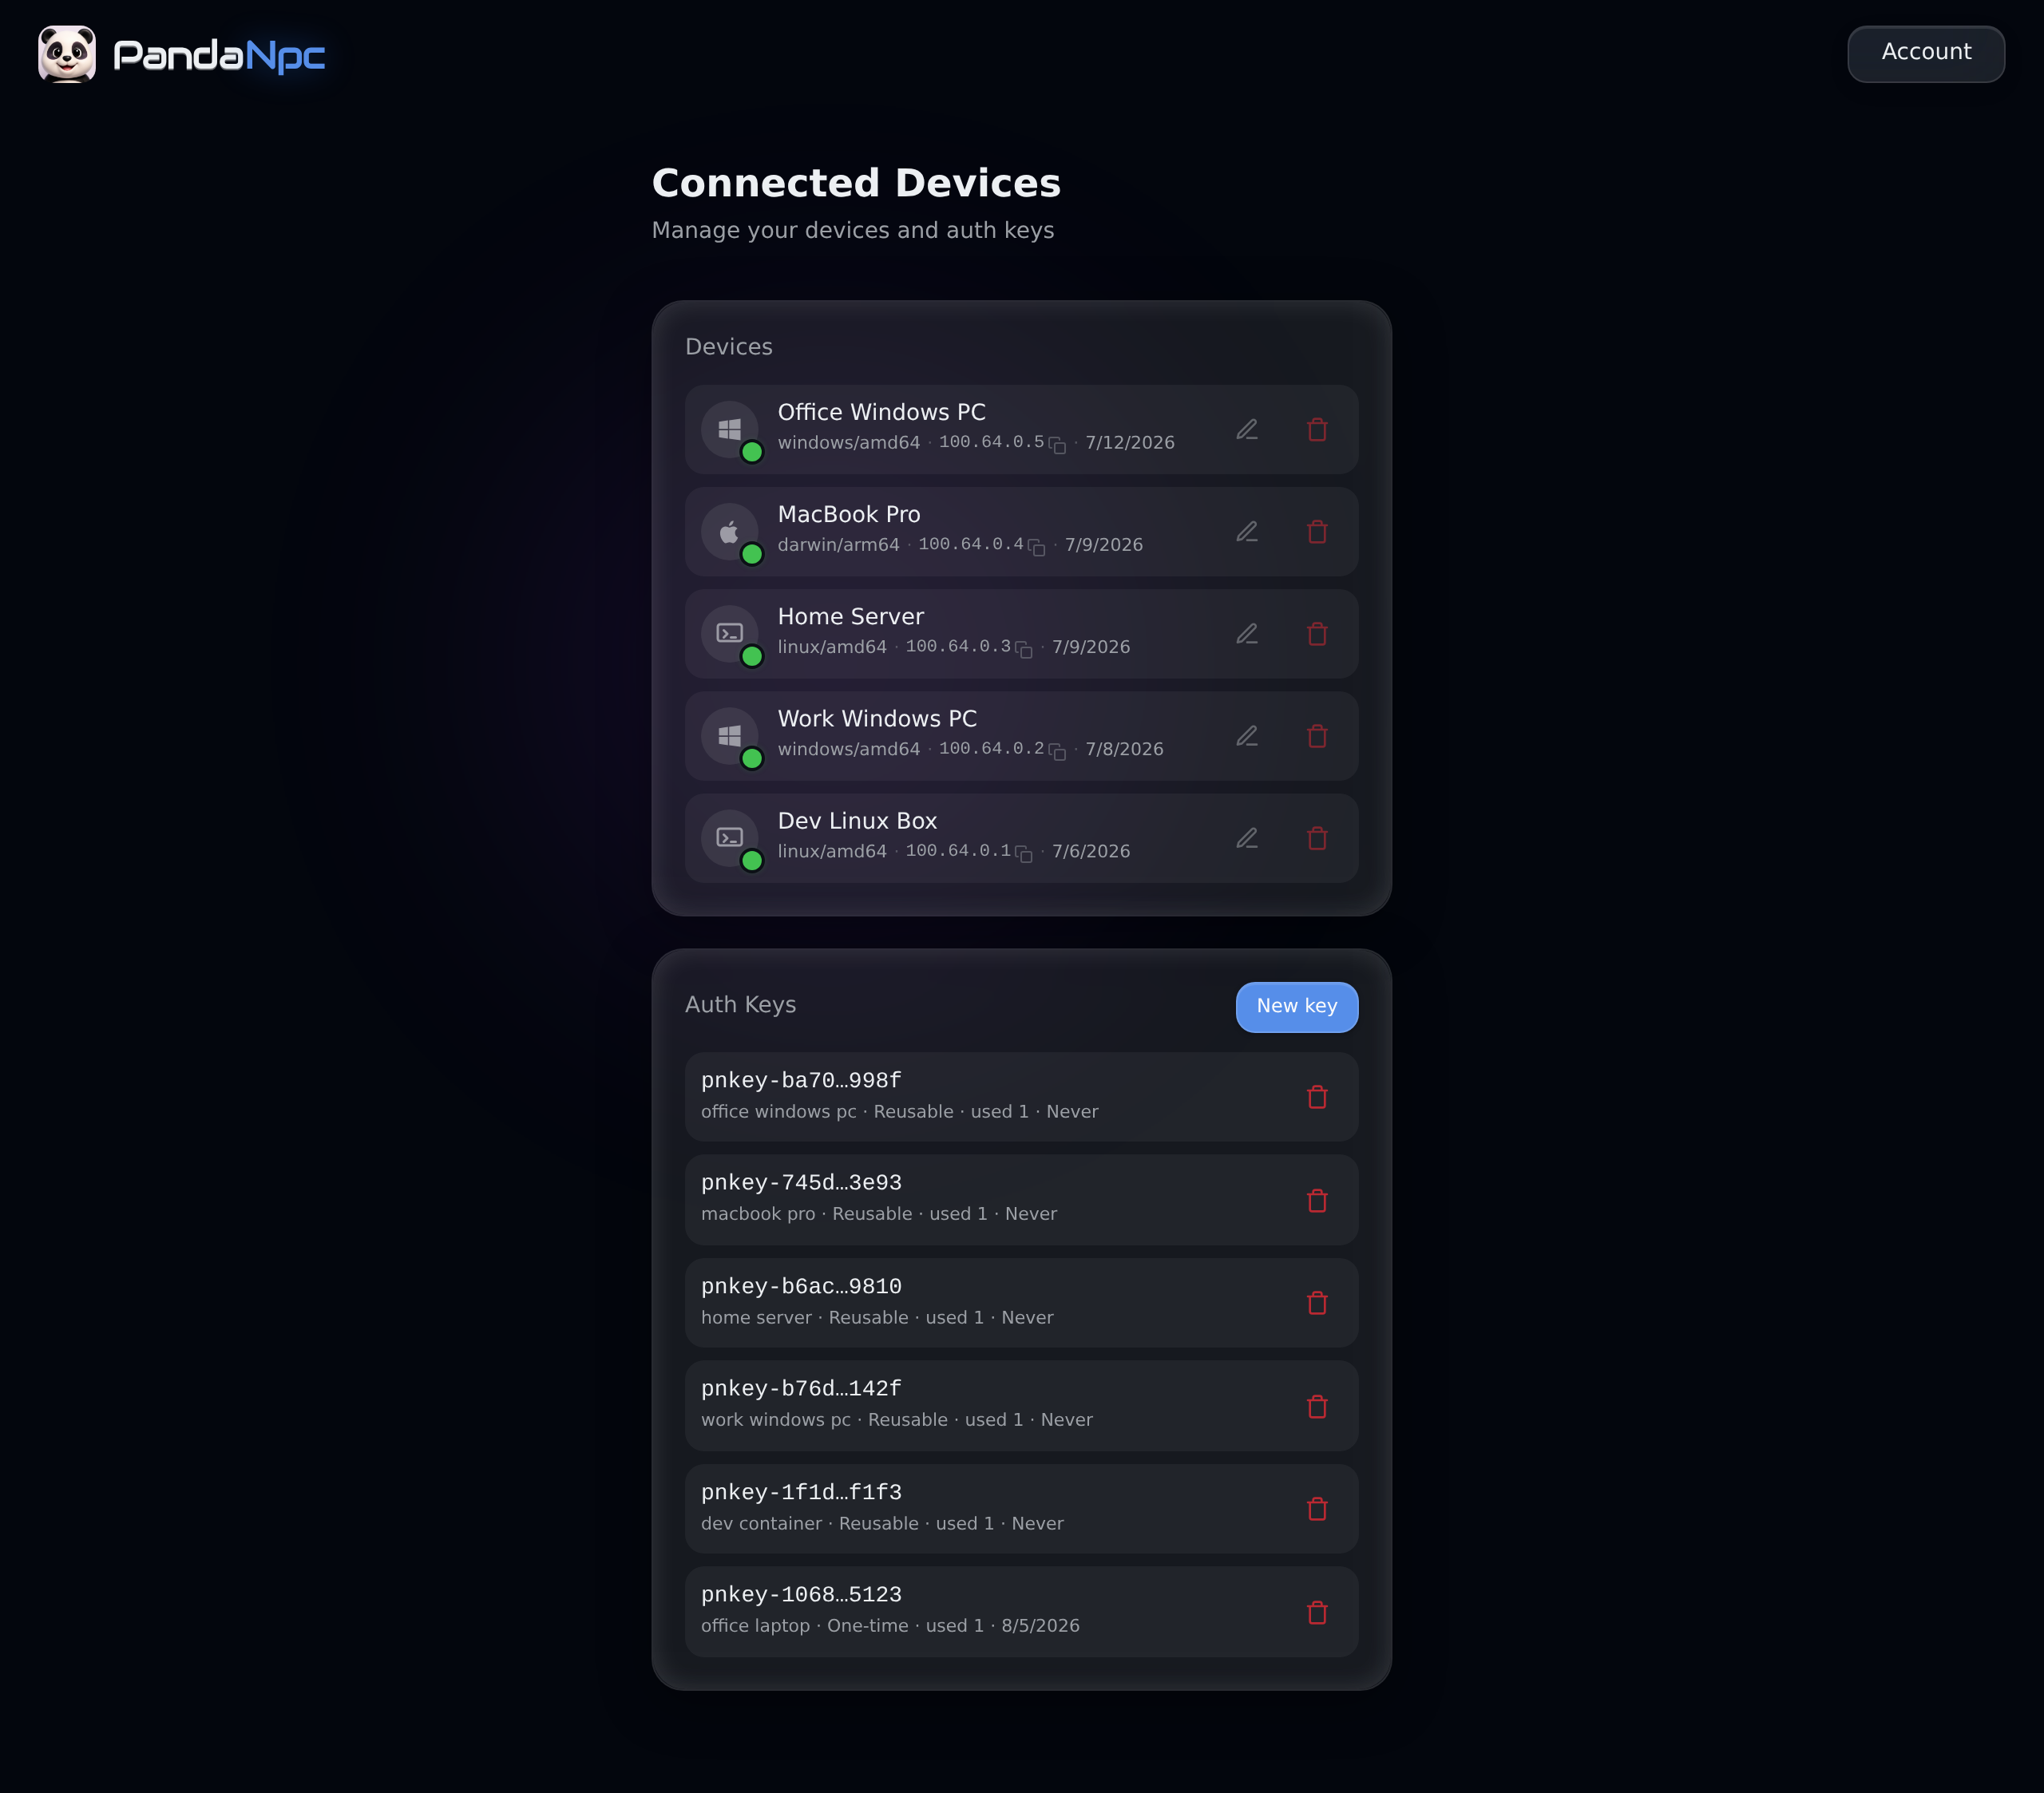
Here you can:
- 🟢 Check online status: A green dot means the device is online – see at a glance which devices are available.
- 📋 Copy private IP: Click the
100.64.x.xIP of any device to copy it, then use it directly for SSH or accessing services. - 💻 Identify system type: Icons clearly show Windows / macOS / Linux.
- ✏️ Rename: Give your devices recognizable names like "Office Windows PC" or "Home Server".
- 🗑️ Revoke: If you no longer want a device on your network, revoke it with one click – it disconnects immediately and cannot rejoin.
Servers and Headless Devices: Auto-Join with One Command
For machines without a graphical interface, like your home NAS, cloud server, or development container, you can join using an Auth Key – with just one command.
First, on the device management page, in the Auth Keys section, click "New key" to generate a key:
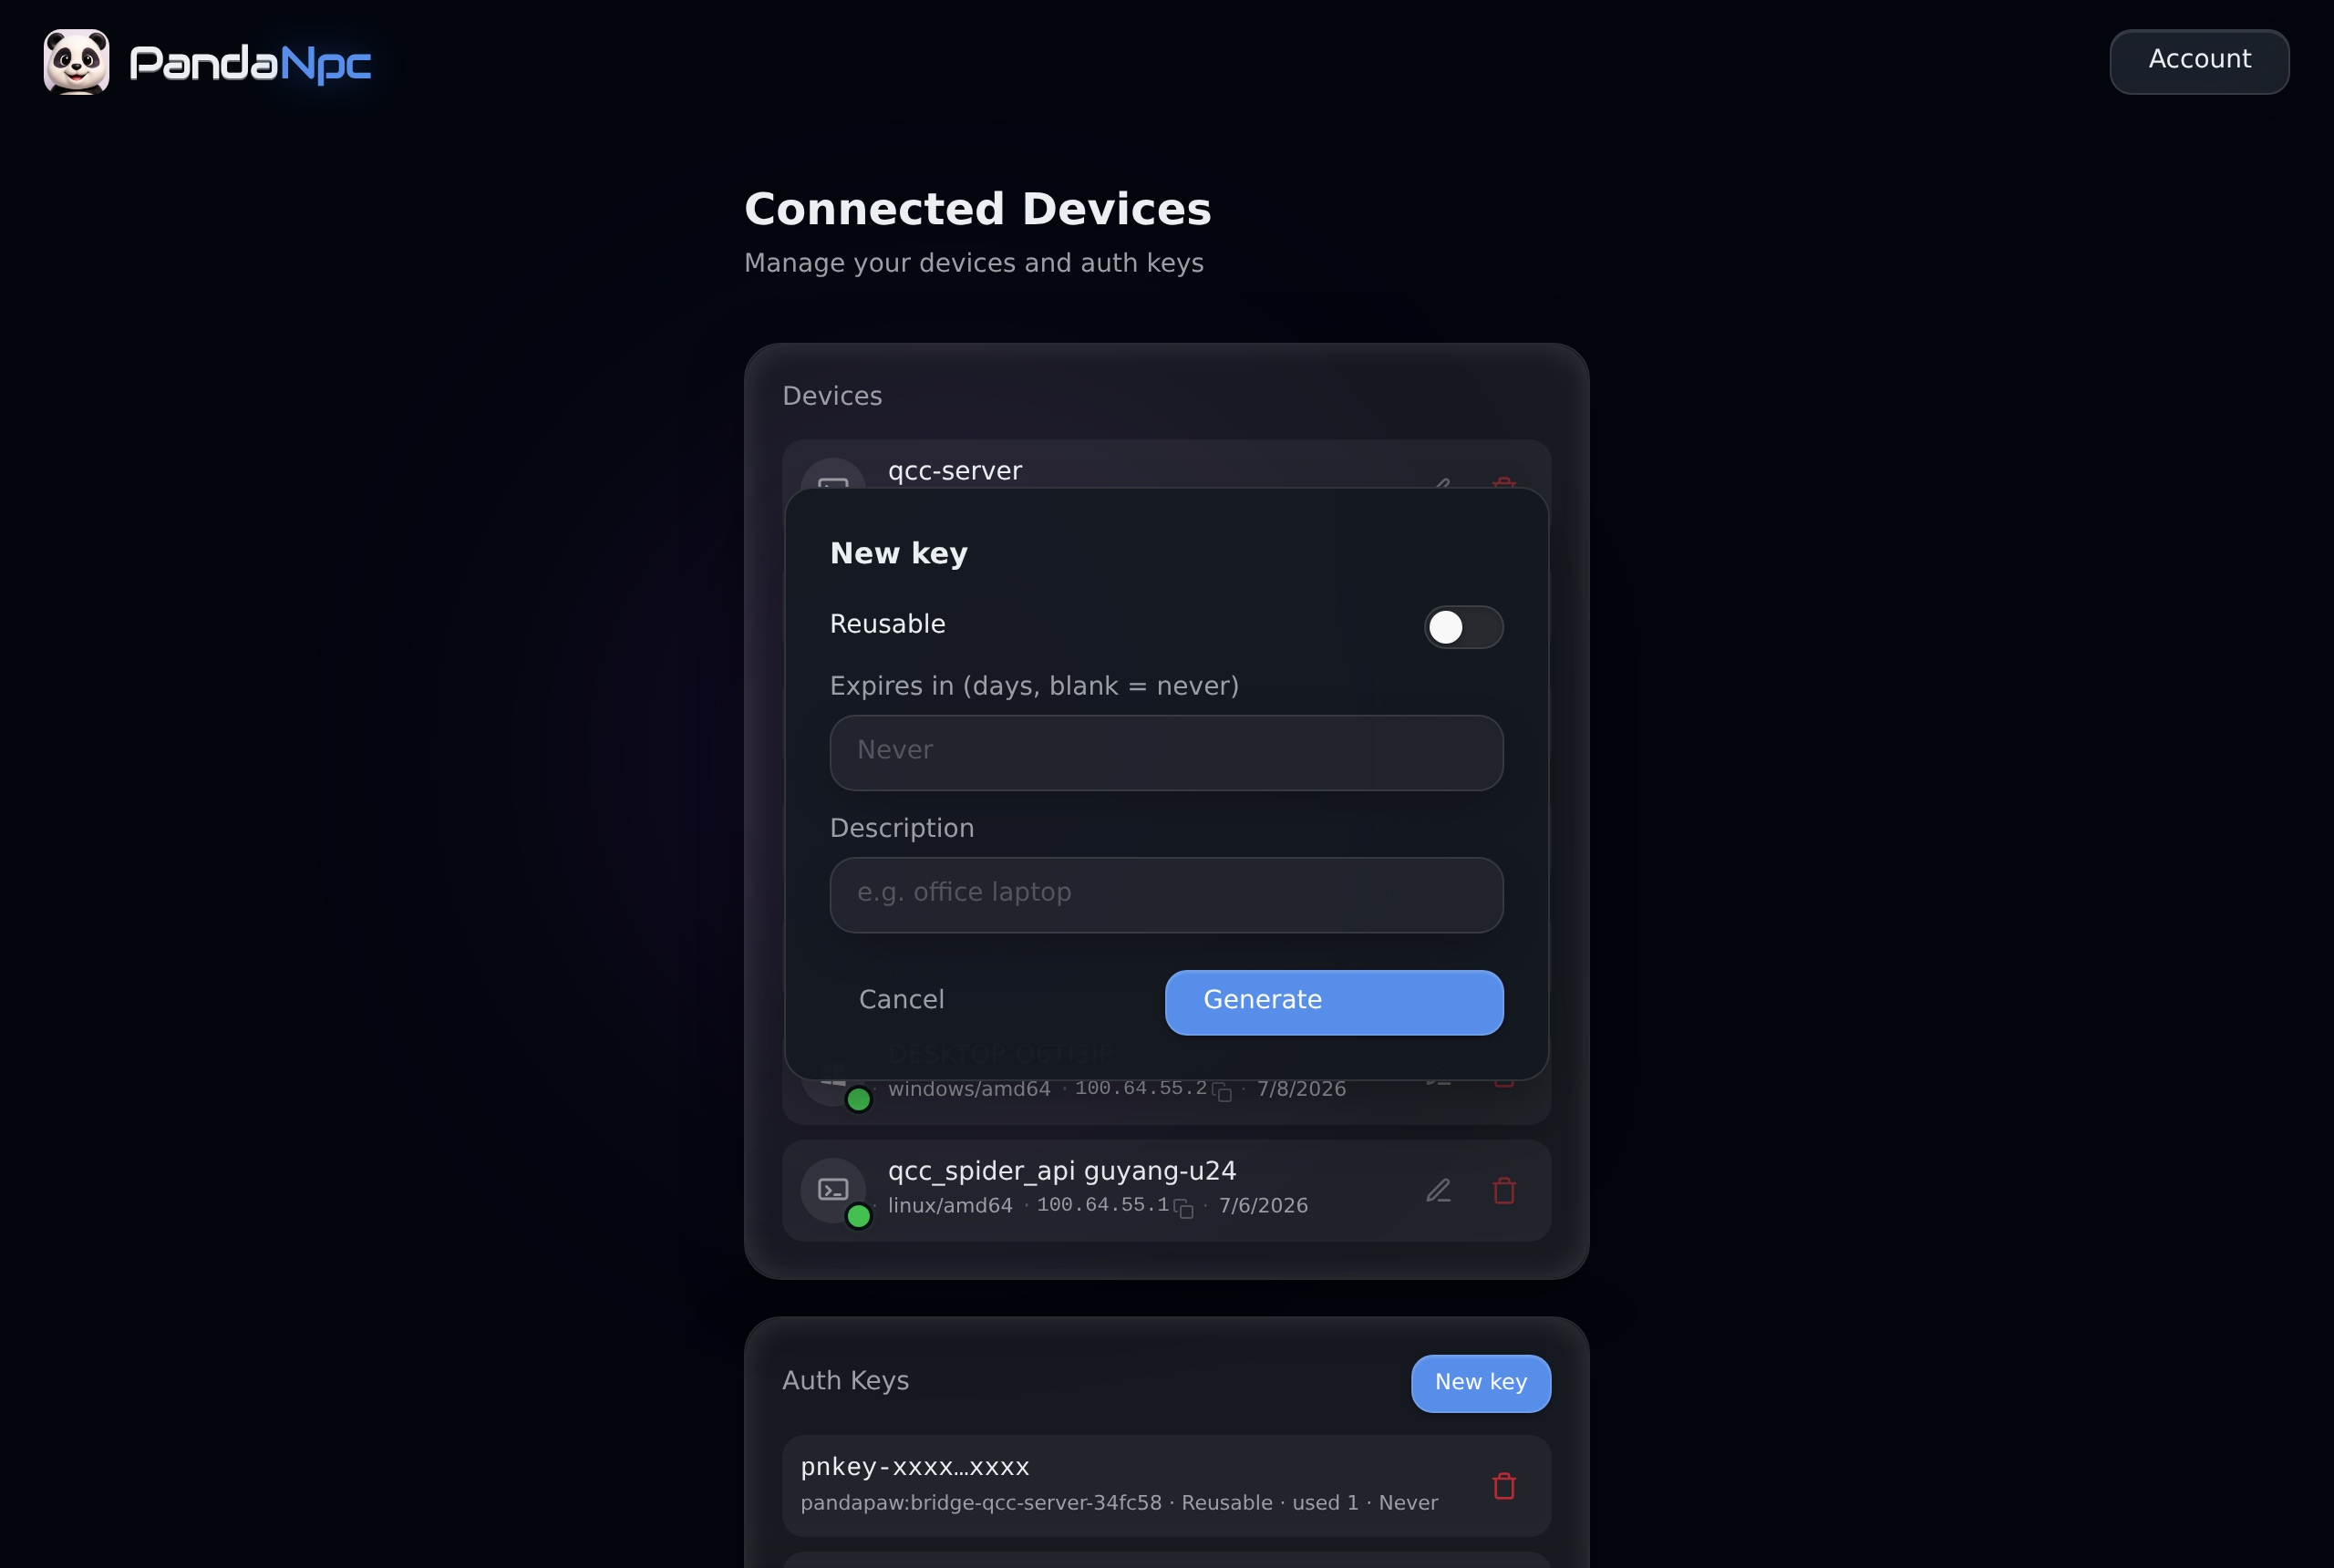
When generating, you can configure:
- Reusable: One key can be used to set up multiple machines; if unchecked, it's a one-time key that expires after first use.
- Expires in: Leave blank for permanent validity, or set it to expire after a few days.
- Description: Add a note about which machine this key is for.
Second, after generation, a popup directly shows a one-command install command with the key embedded. Click the copy button to grab it (the plaintext key is shown only once):
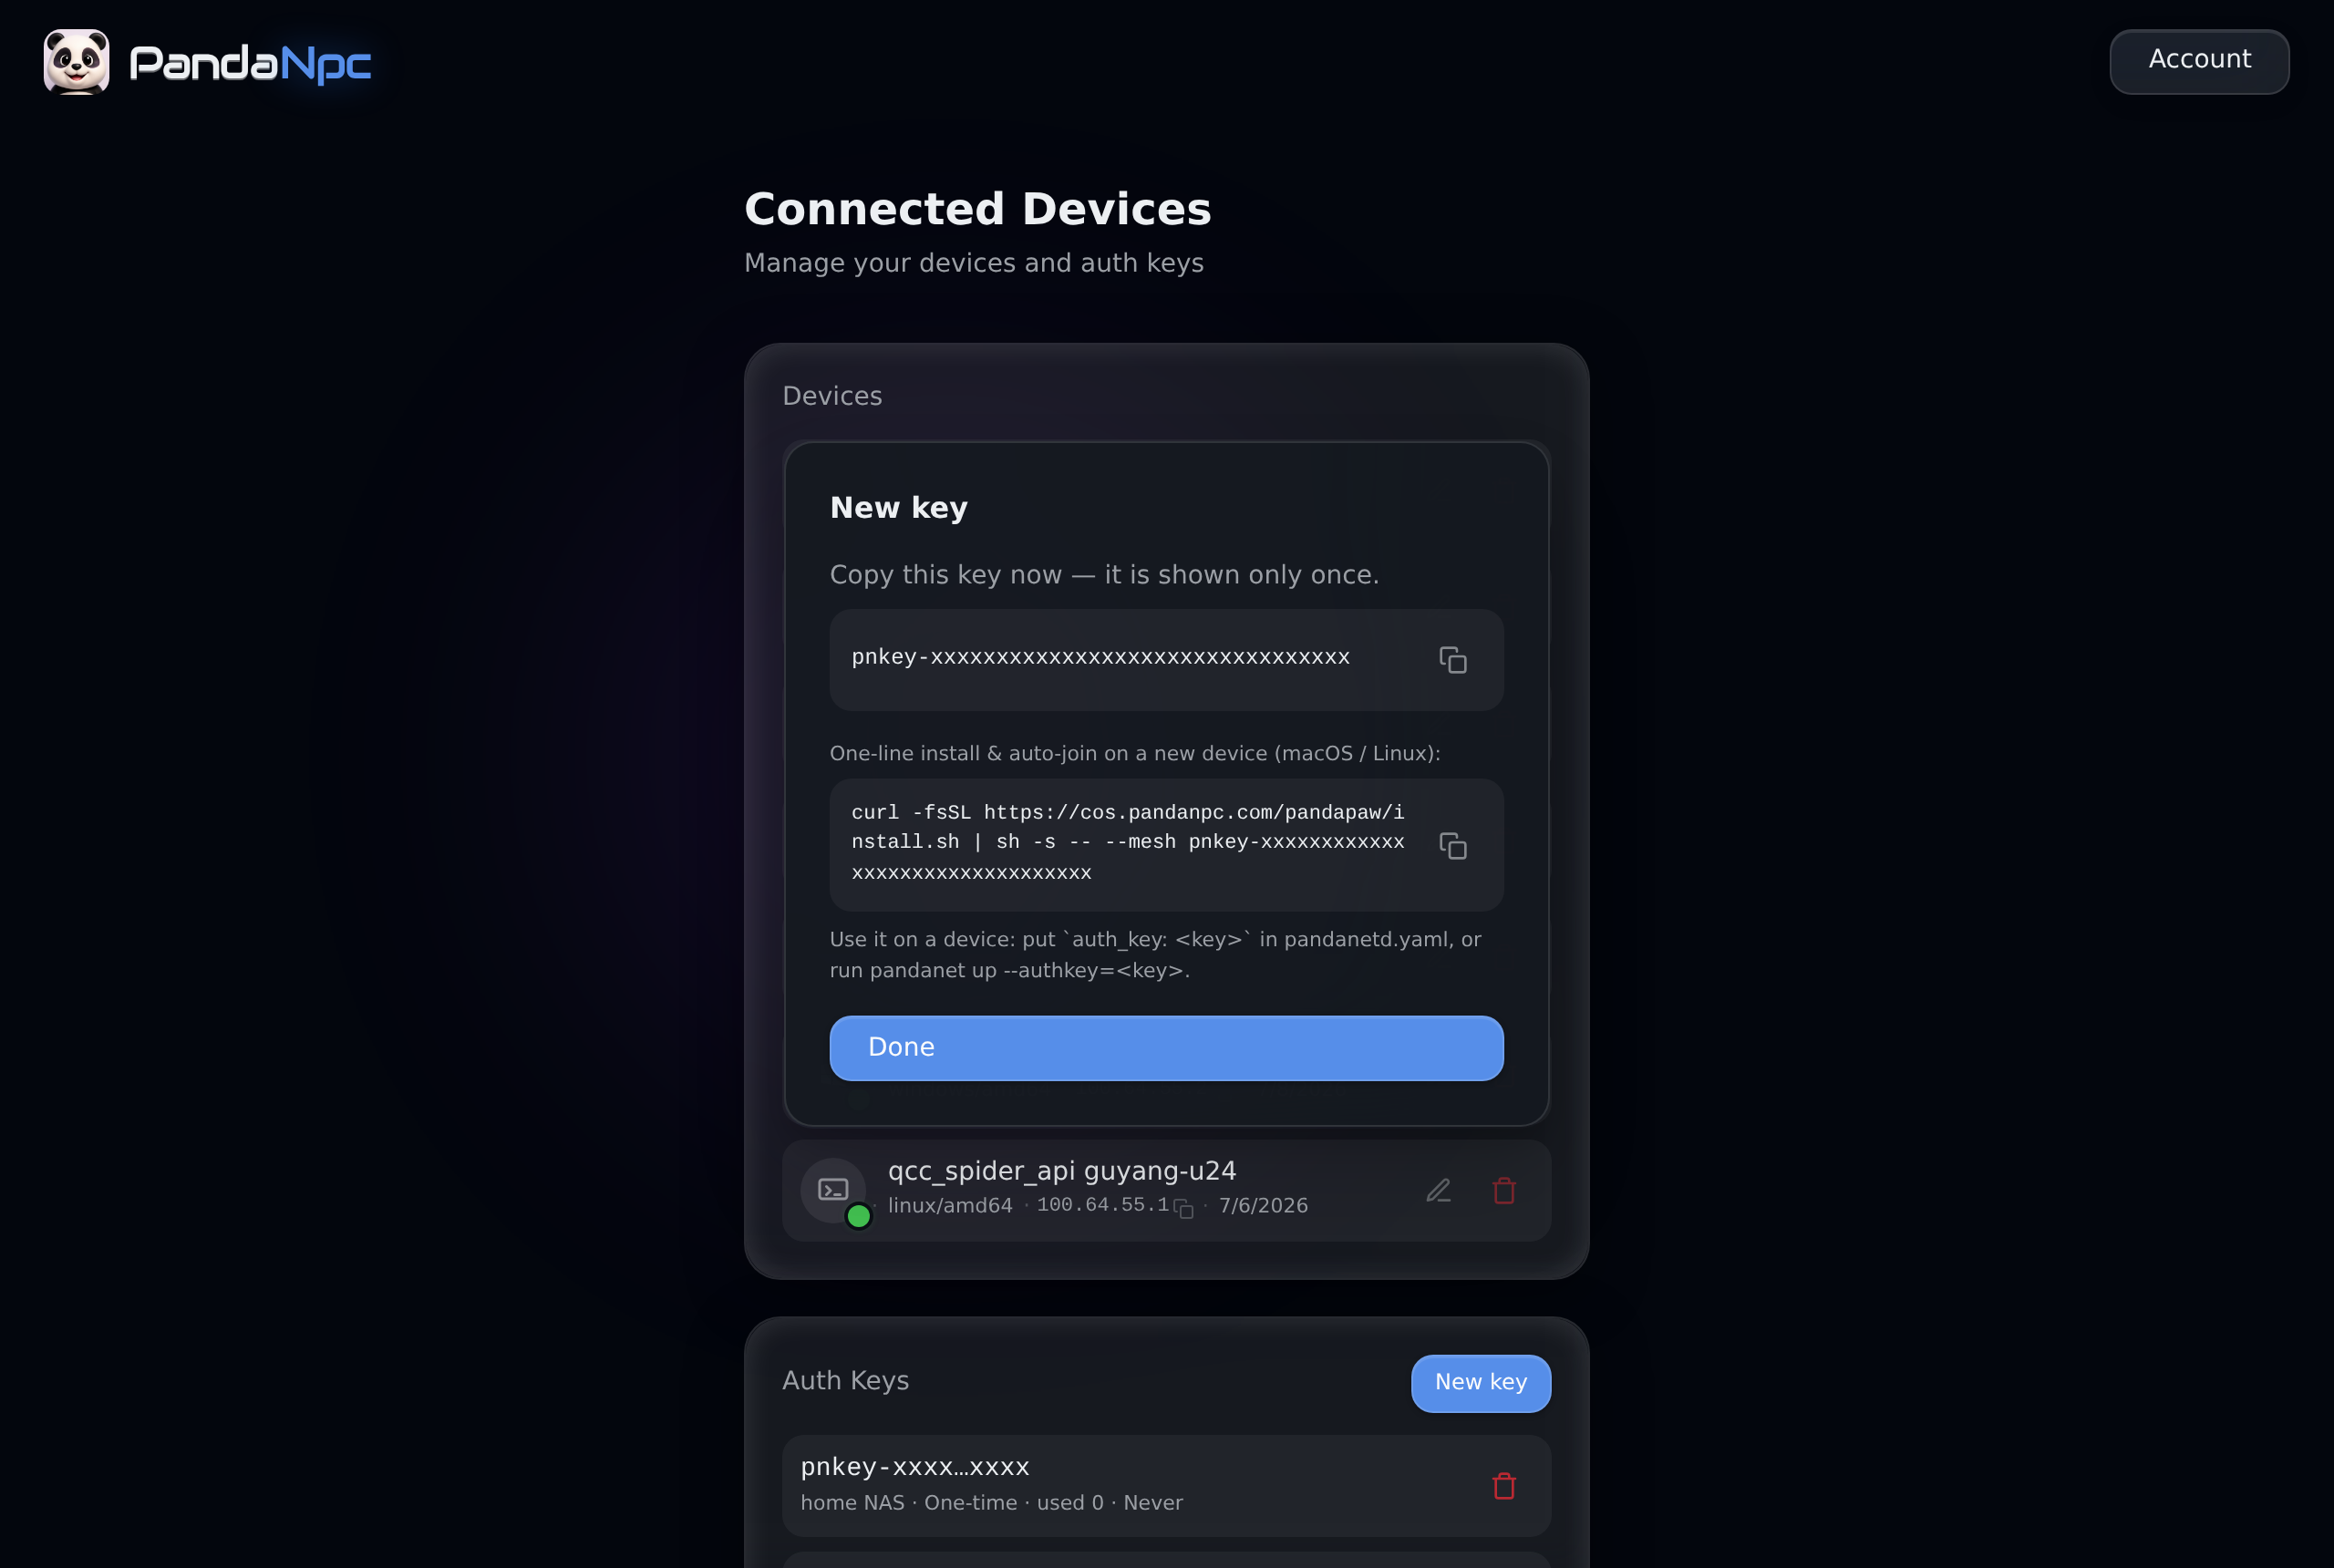
Third, paste and run the command on the target machine:
macOS / Linux:
curl -fsSL https://cos.pandanpc.com/pandapaw/install.sh | sh -s -- --mesh pnkey-xxxxxxxxWindows (PowerShell as Administrator):
$env:PANDANET_KEY="pnkey-xxxxxxxx"; iwr -useb https://cos.pandanpc.com/pandapaw/install.ps1 | iexThis single command does everything automatically:
- Installs pandapaw (which includes the built-in AI engine pandacode);
- Automatically pairs this machine with your account – it will appear in your Claude Code connection list, and other devices can immediately use it remotely for AI sessions;
- Installs the networking system service and automatically joins the network, printing the device's private IP at the end.
Zero manual steps – your machine is ready to use immediately.
Alternative methods:
- If pandapaw is already installed, to join the network:
pandanet up --authkey=pnkey-xxxxxxxx - For a permanent service: write the key into the
auth_keyfield ofpandanetd.yamland then runpandanet install - Without a key: simply run
pandanet up. It will print an authorization link. Log in to your PandaNpc account in your browser and click "Approve" – the device will join the network.
Configuration Options
All Device Interconnect settings are centralized in Settings → Connected Devices:
| Configuration | Purpose | Default |
|---|---|---|
| Enable/Remove Connected Devices | Join or leave your private network (removing only stops the service; installation is retained for quick re-enable) | Auto-enabled after login |
| Allow remote control of this device | When enabled, sessions under your account can remotely control the desktop (mouse/keyboard/screen) of this machine. A red banner appears at the top of the screen while controlled; can be turned off anytime | Off |
| Rename/revoke a device | Manage each device in your network; revocation takes effect immediately | — |
| Auth Key management | Generate/revoke keys for unattended device joining | — |
Typical Use Cases
With a fixed private IP, you can:
- Remotely access Claude Code running on a device: Joined machines are automatically registered as Claude Code connections in your account (the built-in pandacode engine works out of the box – no need to install a separate CLI). A session running on your development machine can be picked up from another device and controlled remotely – you can leave the machine running while you go.
- SSH from anywhere:
ssh user@100.64.0.2– no matter whether the machine is at the office or at home. - Access internal services: Web services, databases, or NAS running on a machine – use the private IP to access them directly without exposing them to the public internet.
- Remote desktop control: With "Allow remote control of this device" enabled, your AI sessions can also remotely operate that machine's desktop.
Security Details
- End-to-end encryption: Traffic between devices is encrypted with WireGuard; the control plane cannot see the content.
- Zero public exposure: No public ports are opened; services are only reachable within your private network.
- Connect only to your own devices: The network is isolated per account. Auth keys belong to your account – other people's devices cannot join your network. When approving a device via browser, you will be prompted to verify the device name.
- Revocable at any time: Any device or key can be revoked with one click from the management page, taking effect immediately.
- Coexists with existing tools: If you already have Tailscale or similar tools installed on the same machine, they work without interference.
Summary
Device Interconnect simplifies the cumbersome task of "accessing my own machines from outside" into a single click in the client: no public IP, no port forwarding, no need to rent a relay server. You get a private network that is end-to-end encrypted and reachable anytime, anywhere. Desktop devices enable it with one click; servers automatically pair and join with a single command containing an auth key. All devices are managed from one page. Combined with remote Claude Code access and remote desktop control, your development machine truly becomes "leave it running while you're away, and reconnect from anywhere."
Related guides

Codex vs Claude Code: Which Should You Use? (2026)
Codex vs Claude Code: choose Claude for terminal depth and hooks, Codex for ChatGPT/cloud work, and PandaNpc to control both across devices.
Read article →
Use Codex on Your Phone: ChatGPT Remote vs CLI (2026)
Use ChatGPT Remote to control supported Mac/Windows Codex chats from iPhone or Android; use PandaNpc for Codex CLI, Linux, and headless hosts.
Read article →
Codex Enable GPT-5.6 Sol 1M Context: 3-Line `config.toml` Configuration Tutorial
GPT-5.6 Sol officially supports a 1.05 million token context. Simply add 3 lines of configuration at the top of Codex's config.toml to run with a 1 million window, and it will automatically compact history at roughly 900,000 tokens. Includes permanent configuration, single command, verification, and cost reminders.
Read article →